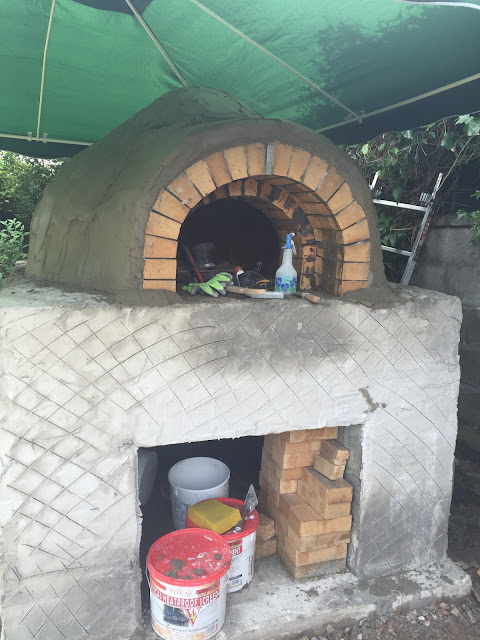
The dome has been covered with Vitcas Heatproof Screed. Those 4 tubs i had to buy earlier because they are not supplying enough materials. I used just over 3 tubs to cover my dome in an inch of screed.
Here I am building up a level on which to build a chimney. I had intended to build a chimney using the excess firebricks I have....however... since starting the patio and realizing how bad the rain is here in Scotland I decide to build a roof over the oven later. So my chimney will be no more, I need a Stainless Flue that will go through the Gazebo roof that I will build later..
Here you can see the ceramic blanket insulation supplied by Vitcas for a 1 meter oven. It is not sufficient for my 110 oven. Good Job I bought an extra 3m of 50mm insulation for good measure. You can also see the chicken wire supplied by Vitcas is not enough for my oven. So I bought more at an excellent price from one of my go to places "Tool Station". At a massively cheaper price than Vitcas.
Here you can see the first 'Scratch Coat" render. After much fussing and reading on the net i decided on a mix of Lime - Building Sand - Cement in a 1-4-1 mix.- For the first coat. The second coat I reduced the Lime content slightly perhaps to about 50% so 0.5-4-1
For the third coat I tried something different....
Above: applying the finish coat.
For the finish coat (3rd external cement layer) I don't use lime. I use a 4-1 Sand cement mix but add a mixture of Bostik Cementone Waterproofer as the water. It said 30 to 1. I put enough to cover the bottom of a bucket in 2 CM of liquid and filled the bucket with water.
The guidance states not to use lime with this additive.
The plus side of using this waterproof seems to be that it is waterproof but breathable so any water vapour should escape but water should not penetrate.
B&Q sell only 'Mastercrete' cement, that's what I've been using.
I finish the render with a sponge so it has an ethnic finish. I dab the dome so it brings out the aggregate. I leave a built up run from the dome to edges of the base so that any water will run off quickly.
Running costs to Date £1714.65
Additional costs...
B&Q
Mastercrete cement £4.73 a bag X 3 =£14.19
Bostik Cementone Waterproofer = £ 12.43
Hydralime 1 bag =£7.98
Leith's Quarry - Blackhills
Washed Building Sand 0.96 tonnes =£28.51
Total to date : £ 1777.76


Nice Information you have written here. Really Great Stuff. I keep it bookmark for our future purpose. Thanks for the information and links you shared this is so should be a useful and quite informative.
ReplyDeletestatic roma pizza oven