
The Dome begins...

One problem I begin to notice on the third chain is that because of the angles of the firebricks it becomes difficult to keep all the vertical joints staggered because of a space in the blocks on the bottom edge due to the angles.


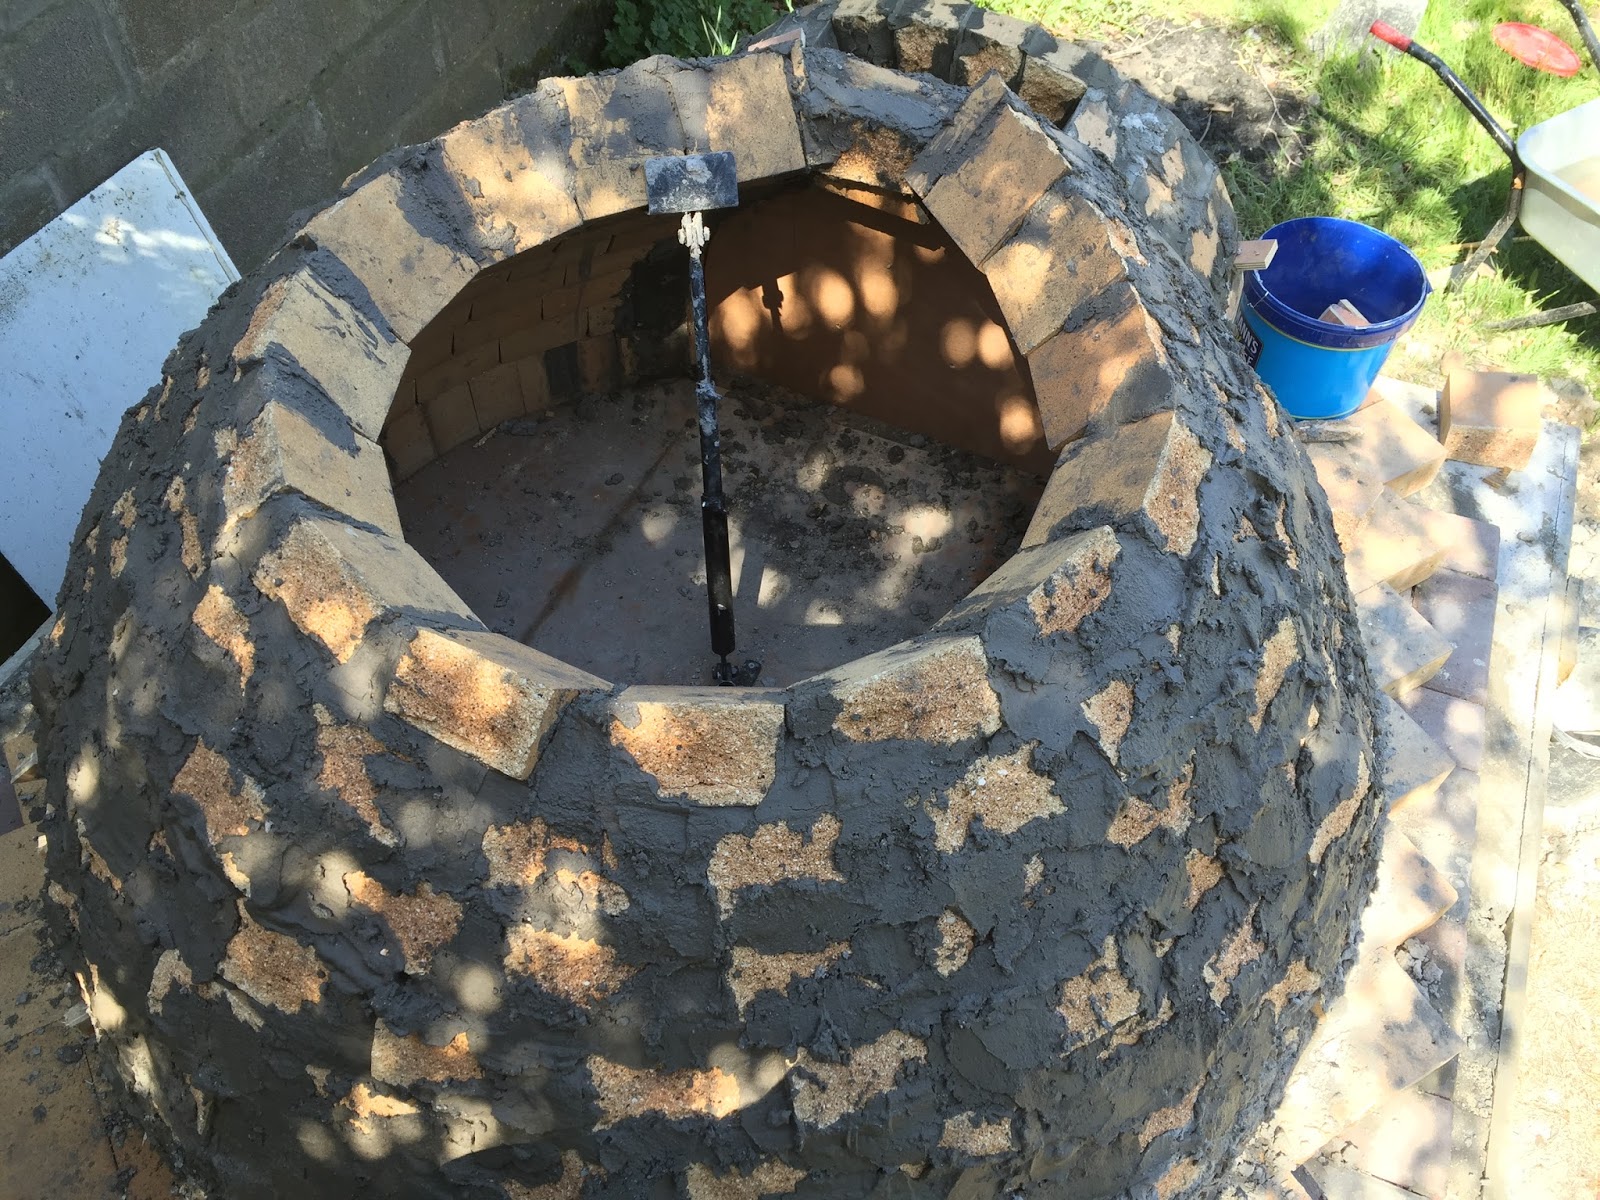


I'll try to make it look better with some fire cement in the gap later.
I've not had any experience building in stone and a professional will be looking at that in horror.
The main thing is it will stay in place and mortar will hide my sins later! - I hope...
The Vitcas trammel was a handy tool. The Vitcas Screed works very well and has an adhesive property after a short time so I was able to build the dome without using any forms.
The drawback with the Vitcas Pizza oven kit is there is no instructions and they don't supply enough mortar or screed. Plenty bricks but not enough of the sticky stuff so far.
I finished the dome off mixing firebrick dust and crumbs with fire mortar to make a screed.
Now I need to source more mortar and screed.
I cut all the fire bricks with a chisel and hammer. It was the cheapest way and for the easier cuts it is most definitely the quickest. A few of the keystones need to be neater so I used an old wet tile saw
which would cut an inch into the brick either side then I split with a chisel.
A lot of folks online suggested buying a saw or using a masonry blade on a chop saw. I called Makita about that and they said that there's no way I should be attempting to do that with their saws.
There have been no additional costs so far.
My internal arch height is 14 3/4 inches. The internal dome height is 25 inches.
Which I think is a good ratio, and I can get inside the oven to finish the mortar.
The arch will be added to with an outside arch slightly wider so the inside arch will act as a door stop. The chimney will have a dampner in it. I'm working on that....

Hi,
ReplyDeleteIs it ok if I use some of your pictures in my teaching resources? Thanks Louis
Sure Louis, no problem.
DeleteI have more pictures to add to the blog, I've since built a patio and a great big roof structure. It's in the process of tiling which is taking a lot longer than thought and there are problems with the weather and the lack of daylight in December here. Do you teach how to build ovens? It fascinating. I wish I kew someone like you when I started. :-)
All the best,
Charlie
complimenti sei stato ingaba
ReplyDelete